ethernaut chall Part.I

0. Hello Ethernaut
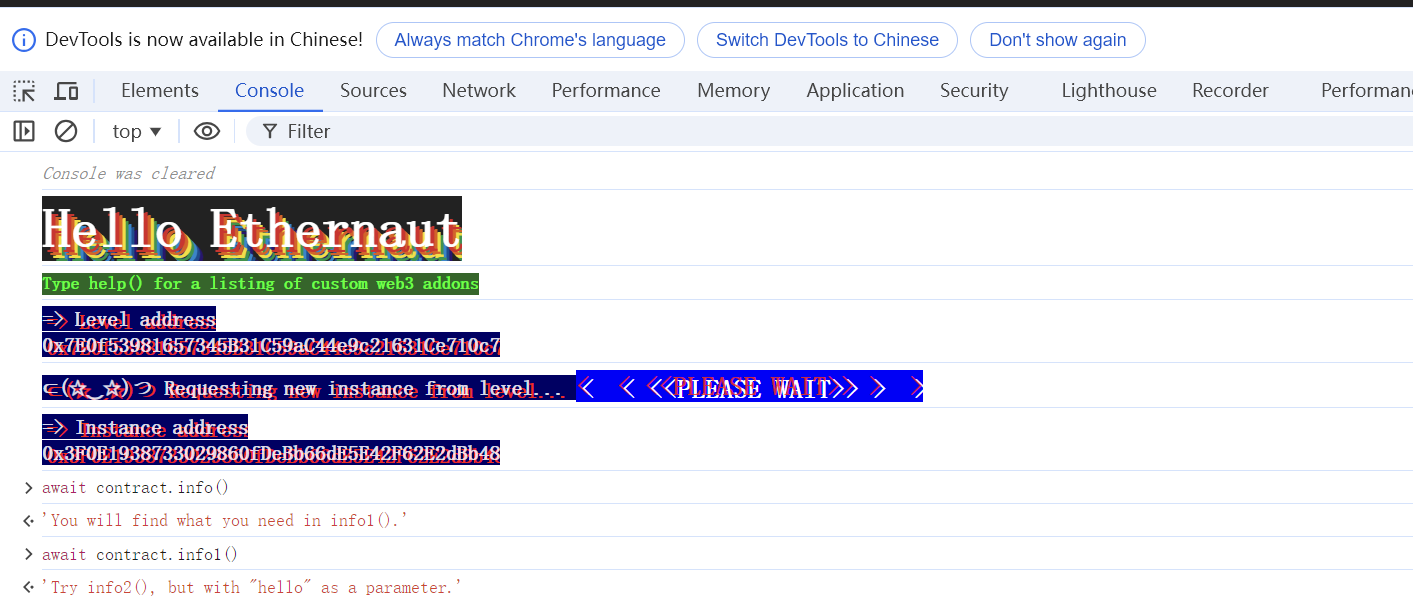
进入界面,然后打开控制台见如下界面
这道题主要是用来介绍如何使用控制台交互合约以及 MetaMask 交互,按提示可以一步一步完成。
1 | await contract.info() |
输入完,提交instance即可。
最后刚刚交互的整个合约代码如下:
1 | // SPDX-License-Identifier: MIT |
1. Fallback
目标:
- 成为合约的owner
- 将余额减少为0
合约代码:
1 | // SPDX-License-Identifier: MIT |
先来审计上面的合约代码,能修改合约 owner 的地方总共有三处,第一处构造函数constructor,显然我们无法在这里修改owner。第二处contribute(),但这个函数要求我们贡献1000eth才可以成为合约的owner,显然也不违背了我们的初衷(笑)。第三处 receive(),这个函数在发生交易时,会被自动调用,且会将owner设置为消息发送者,因此我们需要利用这个函数。
来看看触发条件
- msg.value > 0:contract.sendTransaction({value:1}) 即可
- contributions[msg.sender] > 0:可以通过调用 contribute 来实现
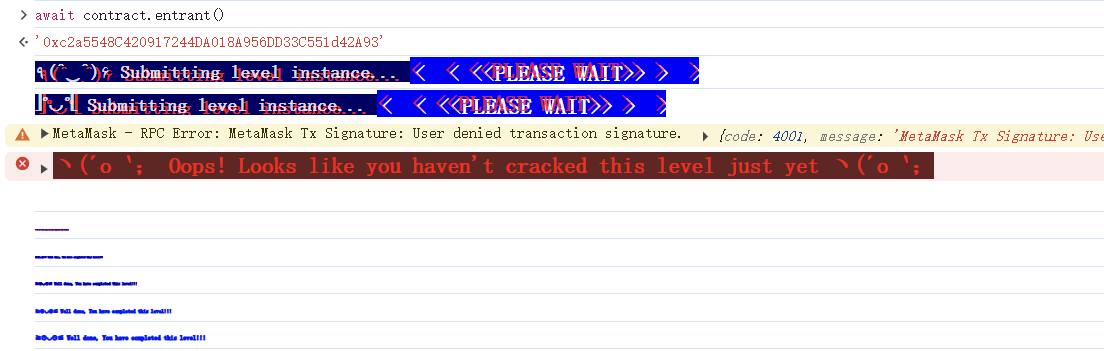
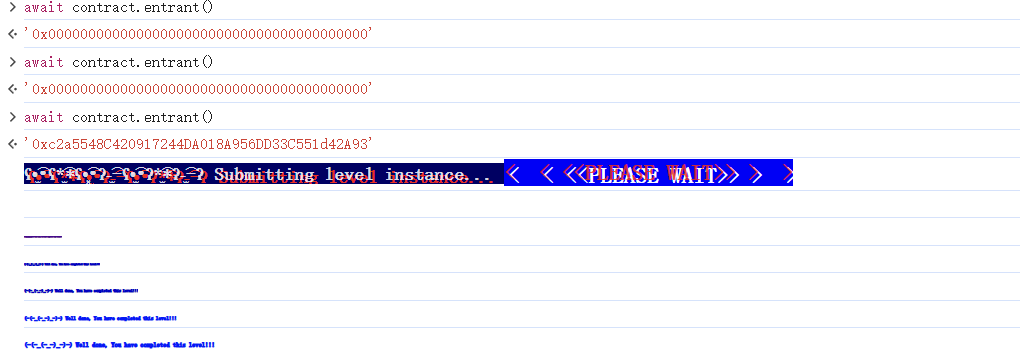
所以说最终攻击代码如下:
1 | await contract.contribute({value: toWei("0.0001")}) |
2. Fallout
目标
获取合约的owner权限
合约代码
1 | // SPDX-License-Identifier: MIT |
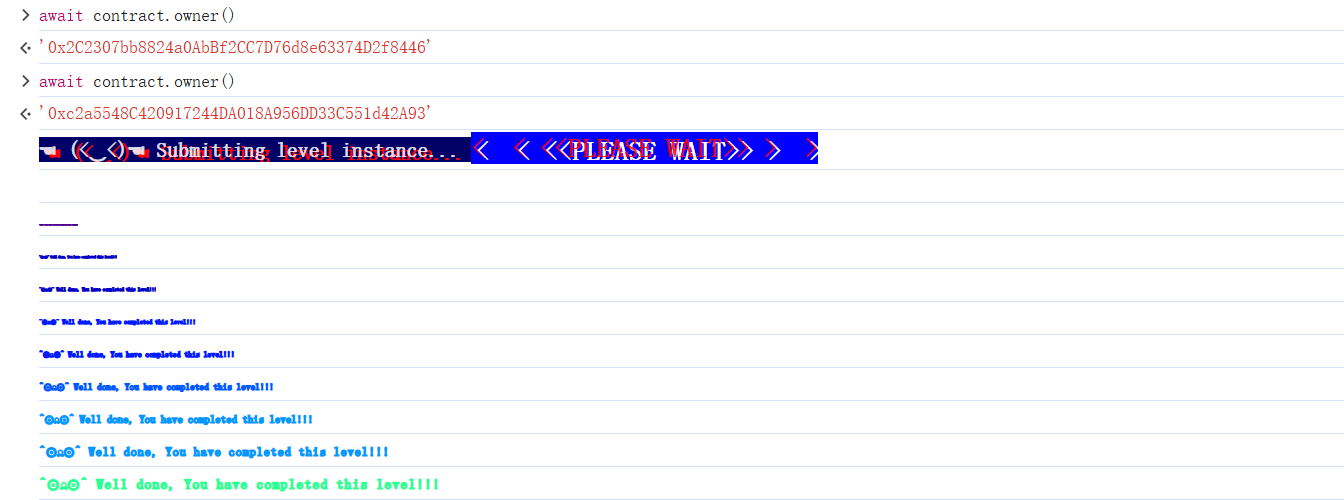
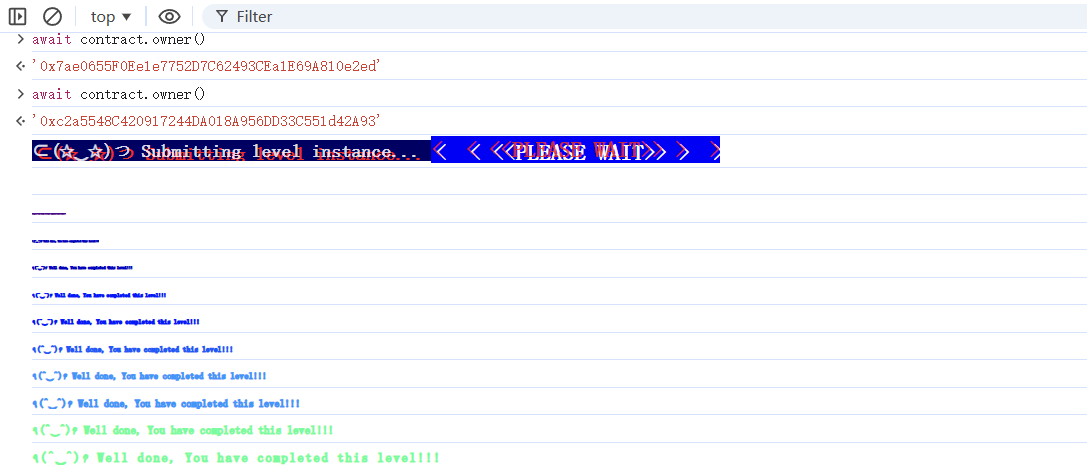
通过审计上面的代码可以发现,构造函数名称与合约名称不一致使其成为一个public类型的函数,即任何人都可以调用,所以可以直接调用构造函数Fal1out来获取合约的ower权限。
1 | contract.Fal1out() |
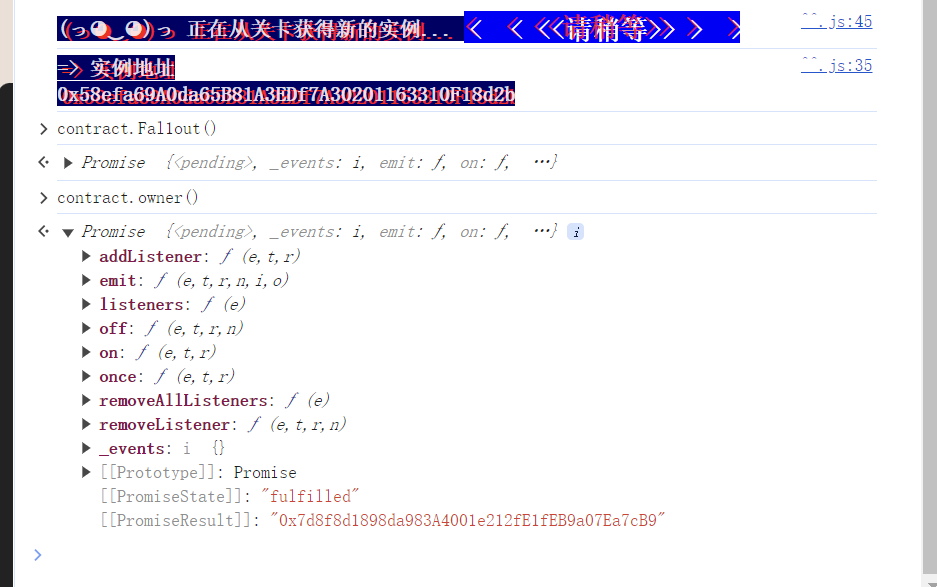
最后成功获取到owner权限
3. Coin Flip
目标
连续猜对硬币方向10次以上
合约代码
1 | // SPDX-License-Identifier: MIT |
这段合约代码是一个简单的以太坊智能合约,用于模拟抛硬币游戏。玩家需要猜测硬币的正反面,如果猜对了,他们的连胜次数会增加,否则连胜次数会重置为零。
flip函数接受一个布尔值参数_guess,表示玩家的猜测(正面或反面)。
使用blockhash(block.number - 1)获取前一个区块的哈希值,并将其转换为uint256类型的blockValue。
如果当前区块哈希值与上一次相同,则调用revert()终止交易,以防止同一块区块被利用来多次抛硬币。
计算硬币的结果coinFlip,这是通过将blockValue除以FACTOR得到的。coinFlip会是0或1,因此可以被用来判断硬币的正反面。
side为true表示硬币为正面,为false表示反面。
如果玩家的猜测与side一致,连胜次数consecutiveWins增加1,函数返回true;否则,连胜次数重置为0,函数返回false。
由于链上数据状态的一致性,透明性,所以我们可以仿照题目合约代码中的逻辑来实现exp,每次都可以猜中对的方向。
注意事项:
FACTOR的值大约是,即 的一半。它被用于将一个 256 位的哈希值(即从 blockhash获取的值)分成两部分。因此最后 side 的值实际上是由 blockvalue 的最高位决定的
exp 如下:
1 | // SPDX-license-Identifier: MIT |
1 | constructor(address _victimAddress) { |
上面这段构造函数里面给定地址之后,就可以调用目标合约地址函数功能。
首先开启一个实例,获取其合约地址
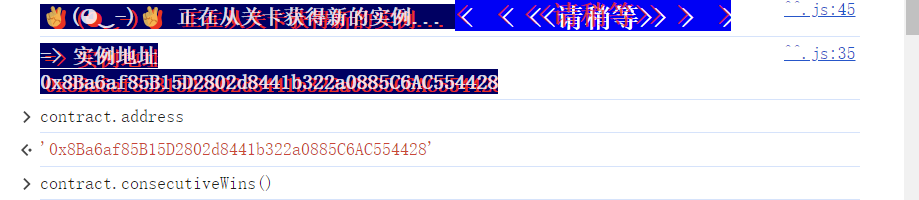
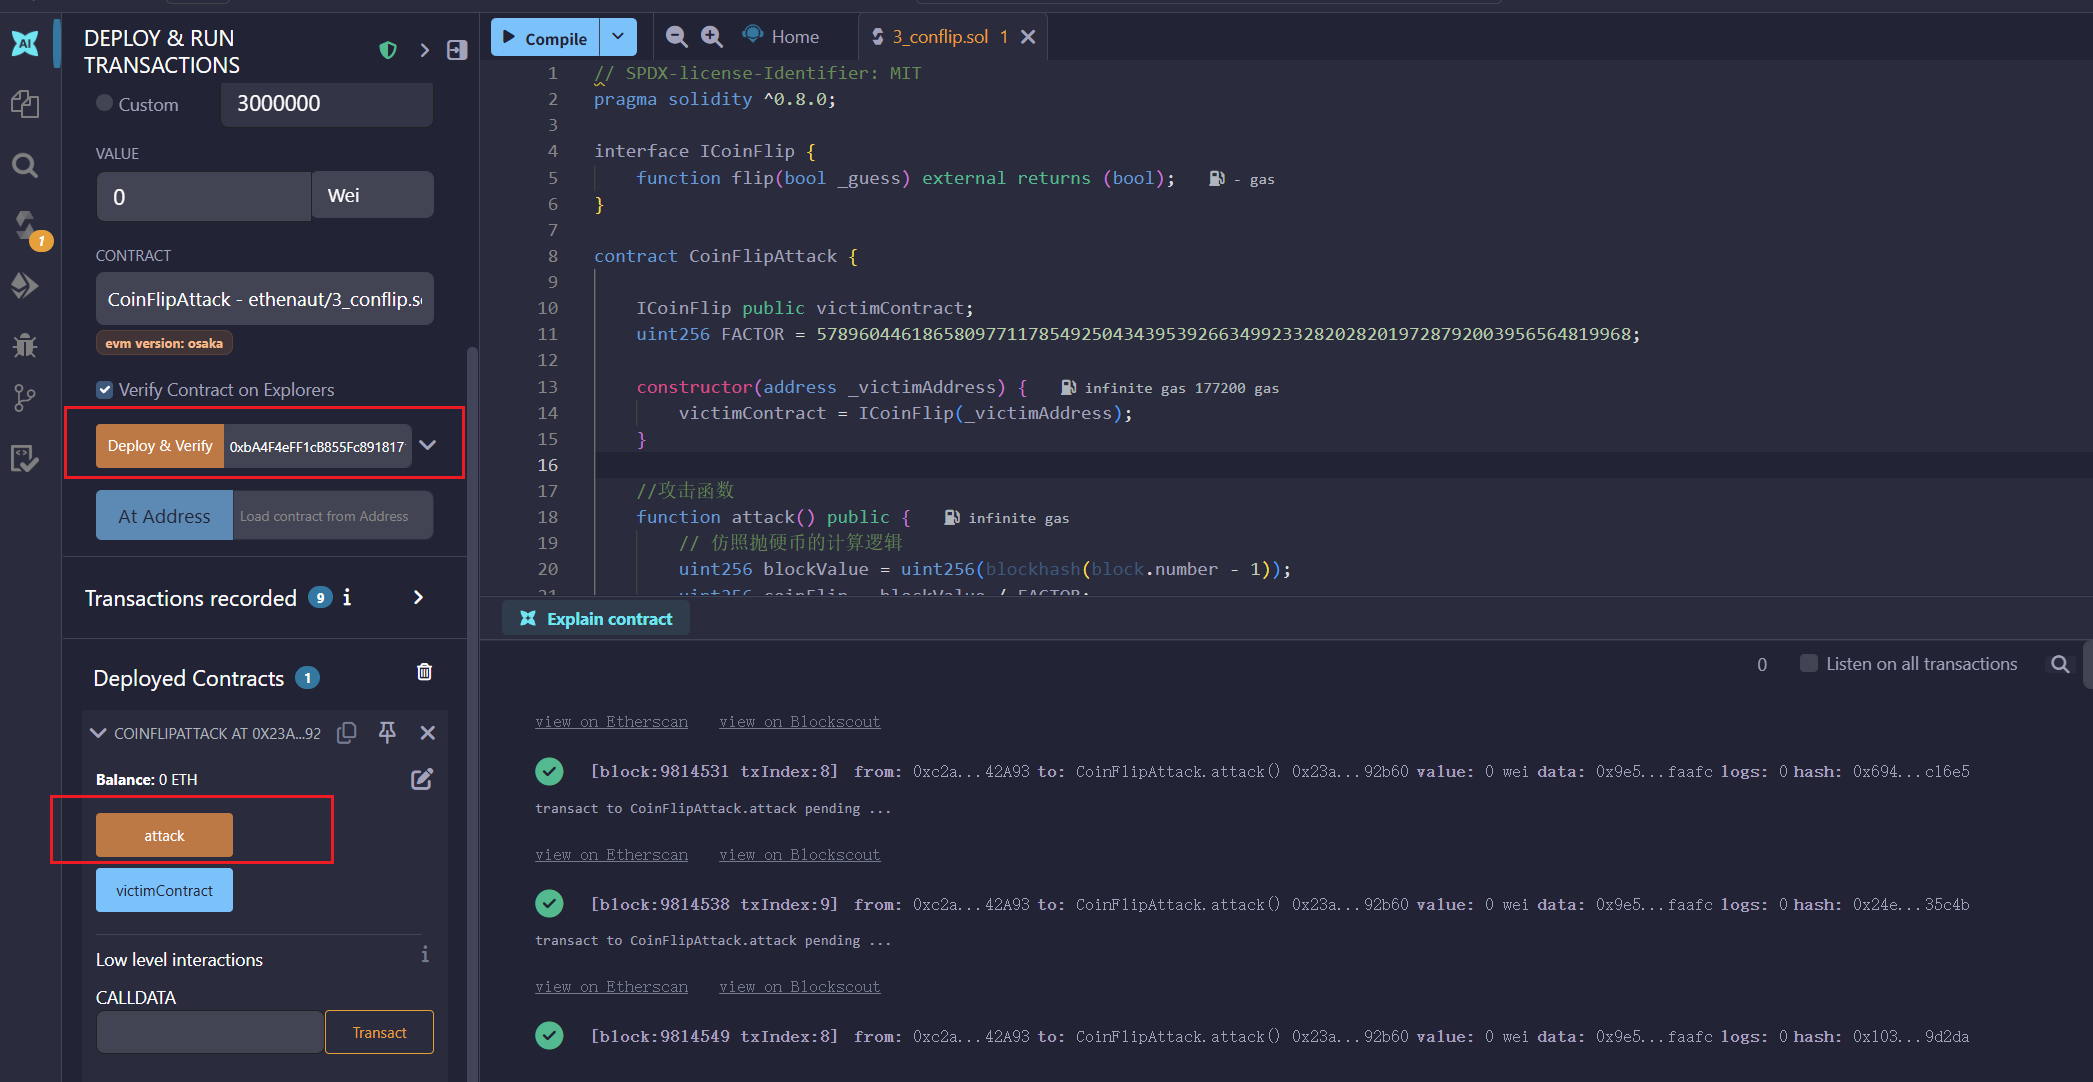
其次需要http://remix.ethereum.org/登陆这个网站,部署exp,编译完之后调用hack函数,设置如下:
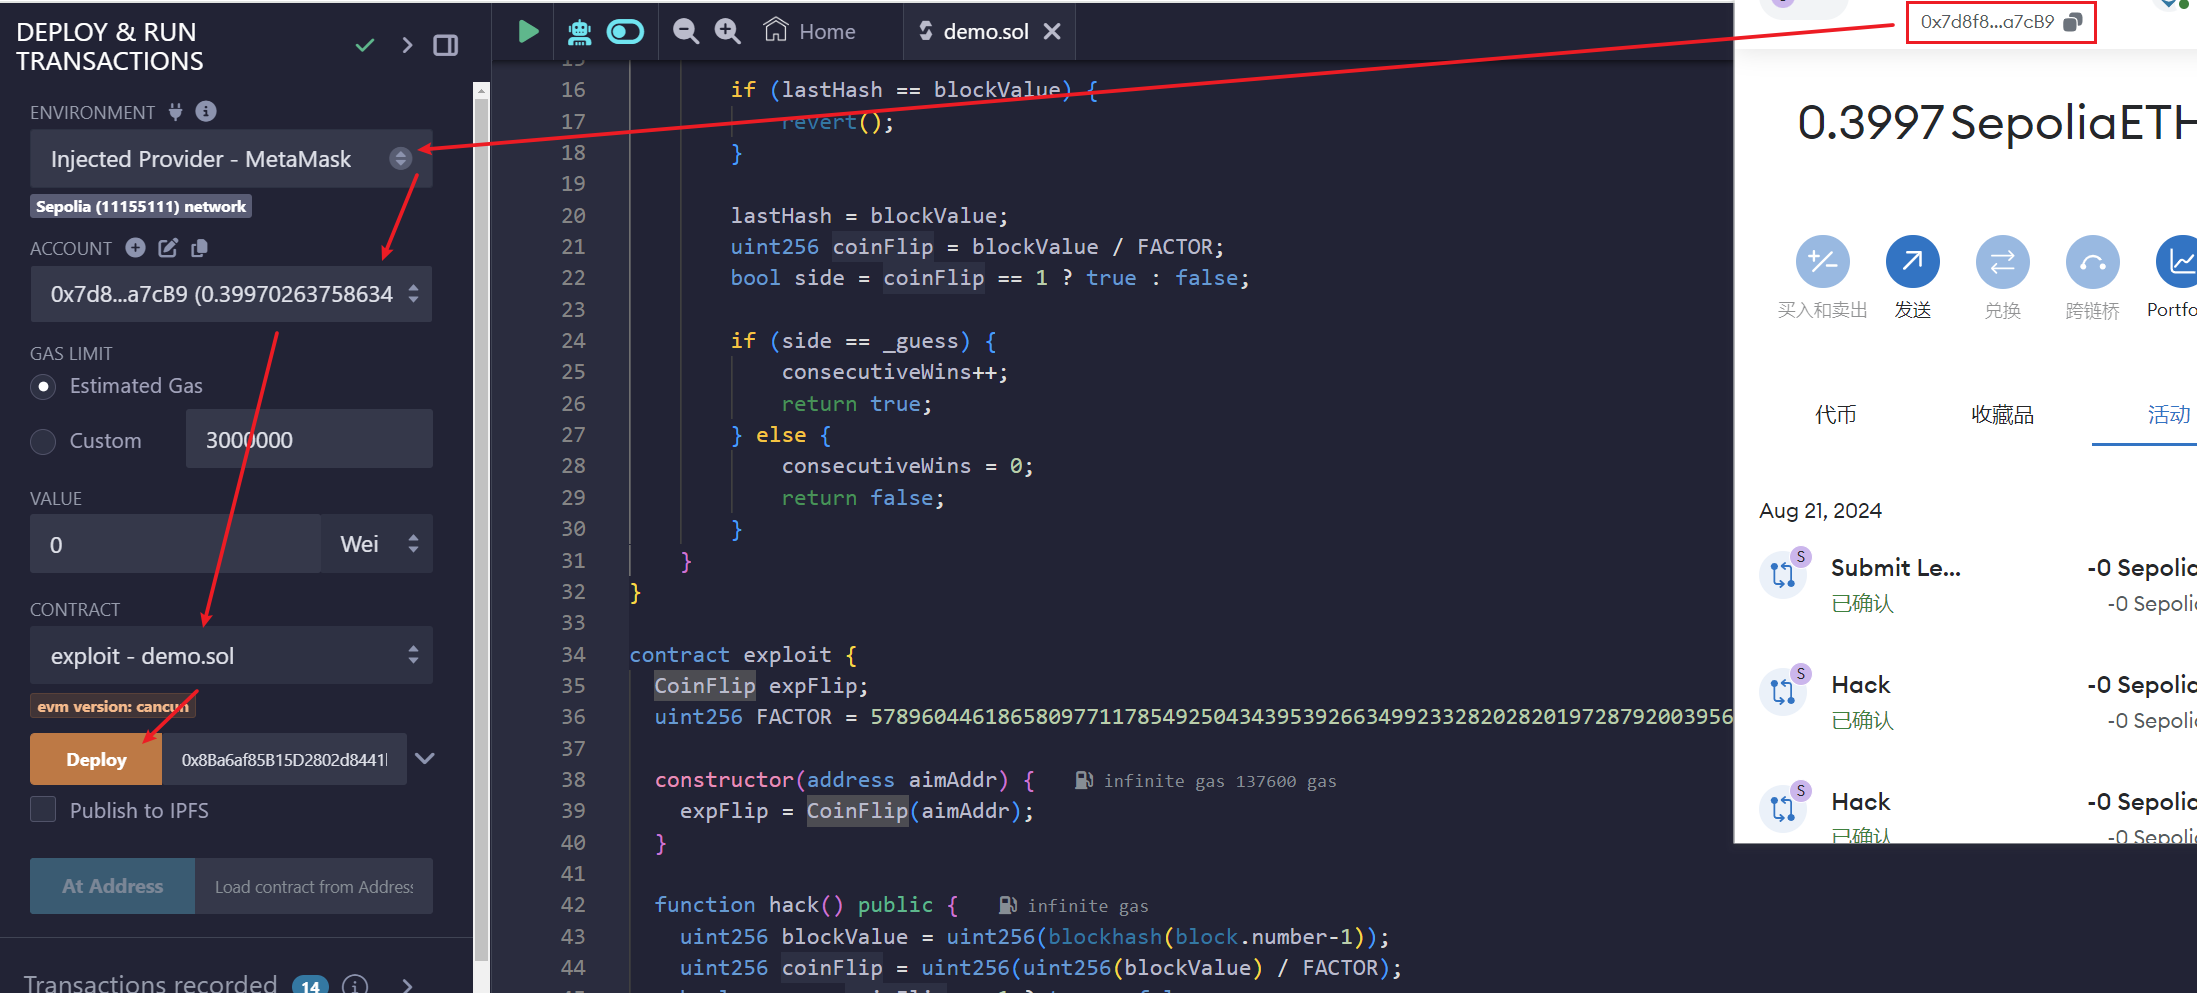
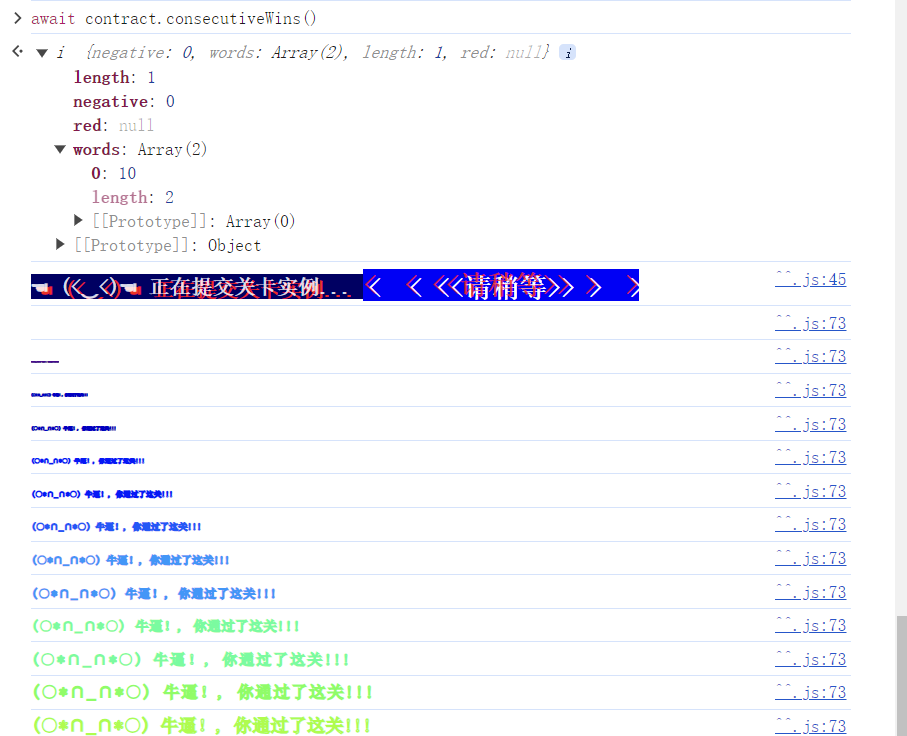
最后连续调用attack 即可。
每次调用可以从终端查看是否成功猜对
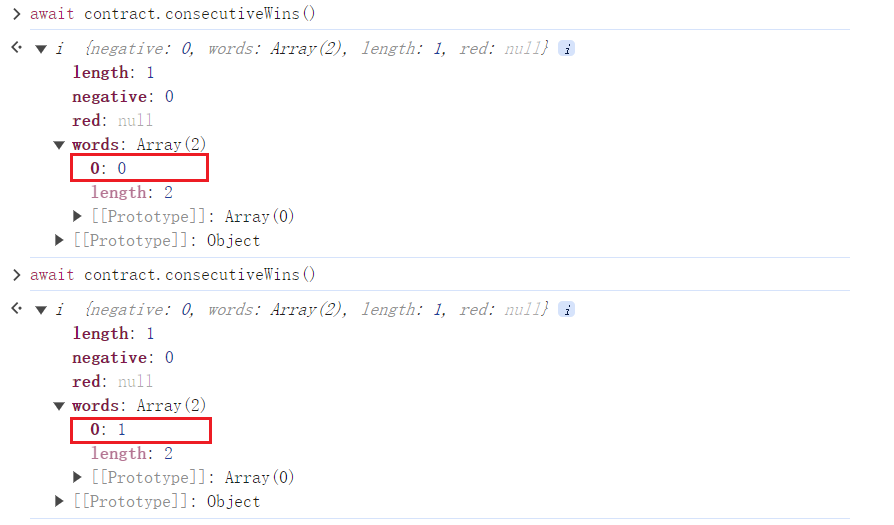
连续完成10次之后,提交就可以完成该实例。
4. Telephone
msg.sender & tx.origin 辨析
合约代码
1 | // SPDX-License-Identifier: MIT |
这段代码中可以通过 changeOwner 函数来改变合约的 owner,但是得通过 tx.origin != msg.sender 这一条件。对于这两者之间的区别如下:
tx.origin 和 msg.sender 都是 Solidity 中用于标识交易发送者的全局变量,但它们的作用范围和使用场景有显著的区别。了解它们之间的区别对于编写安全的智能合约至关重要。下面是对这两个变量的解释:
- tx.origin:交易发送方,是整个交易最开始的地址
- msg.sender:消息发送方,是当前调用的调用方地址
所以如果通过 账户 A -> 合约 A -> 合约 B 来调用的话,tx.origin 就是账户 A,而对于合约 B 来说,msg.sender 是合约 A
所以说,有了上面的知识,我们就可以借助一个中间合约来调用 Telephone,此时 tx.origin 为调用中间合约方(账户A), msg.sender 则就是中间合约自身。
exp
1 | // SPDX-License-Identifier: MIT |
5. Token
Interger Overflow 整数溢出
The goal of this level is for you to hack the basic token contract below.
You are given 20 tokens to start with and you will beat the level if you somehow manage to get your hands on any additional tokens. Preferably a very large amount of tokens.
Things that might help:
- What is an odometer?
合约代码
1 | // SPDX-License-Identifier: MIT |
一个整数溢出漏洞
漏洞分析:
请看这段代码(注意 pragma solidity ^0.6.0,这是关键):
在 Solidity 0.8.0 之前,整数运算不会自动检查溢出。
uint256是无符号整数(非负数)。- 如果你尝试用一个小数字减去一个大数字,比如
20 - 21,它不会变成-1(因为无符号整数不能是负数)。 - 相反,它会发生**下溢 (Underflow)**,变成一个巨大的数字:
2^256 - 1。
具体的漏洞点:
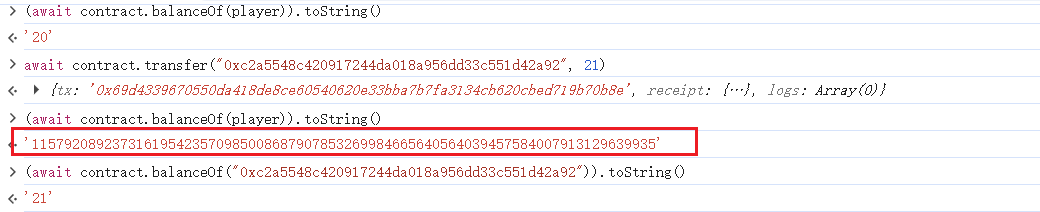
假设你有 20 个 Token (balances[msg.sender] = 20)。
如果你尝试转账 21 个 Token (_value = 21):
- 计算
20 - 21。 - 由于下溢,结果变成了
115792089237316195423570985008687907853269984665640564039457584007913129639935(即MAX_UINT)。 - 这个巨大的数字显然
>= 0,所以require检查通过了! - 接着执行
balances[msg.sender] -= 21。你的余额也会发生下溢,变成那个巨大的数字。
6. Delegation
这一关的核心在于理解 delegatecall 的工作原理以及它如何影响合约的存储(Storage)。
delegatecall(委托调用)
delegatecall 是一种特殊的调用方式。假设合约 A 使用 delegatecall 调用了合约 B 的某个函数:
- 代码逻辑:执行的是 合约 B 的代码。
- **上下文 (Context)**:
msg.sender保持不变(还是调用合约 A 的那个人)。msg.value保持不变。
- 存储 (Storage):最关键的一点! 修改的是 合约 A 的数据,而不是合约 B 的。
比喻:
合约 A 把合约 B 的代码“借”过来,在自己的地盘上跑了一遍。如果合约 B 的代码里写着“把第 0 号变量改成 123”,那么被修改的是合约 A 的第 0 号变量。
场景比喻
- Delegation 合约:是你(有自己的身体、大脑、记忆)。
- Delegate 合约:是一本武功秘籍(只有招式说明,没有实体)。
- delegatecall:是你决定照着秘籍练功。
发生的过程
当你(Delegation)执行
delegatecall去调用秘籍(Delegate)里的pwn()招式时:
- 代码(招式)来自秘籍:
你确实是在读Delegate里的代码:owner = msg.sender。- 执行环境(身体)是你自己的:
虽然招式是秘籍里的,但练功的人是你。
- 代码里说:“把手举起来”。
- 结果:举起来的是你的手,不是秘籍的手(秘籍也没有手)。
- 存储(记忆/状态)是你自己的:
- 代码里说:“把
owner这个变量改成msg.sender”。- 在底层 EVM 中,这句话的意思其实是:“把第 0 号存储槽 (Slot 0) 的数据改掉”。
- 因为当前运行环境是 Delegation,所以 EVM 修改的是 Delegation 的第 0 号存储槽。
对比
call和delegatecall
特性 普通调用 ( call)委托调用 ( delegatecall)代码来源 目标合约 (B) 目标合约 (B) 执行环境 目标合约 (B) 的环境 发起合约 (A) 的环境 修改的存储 目标合约 (B) 的数据 发起合约 (A) 的数据 msg.sender 发起合约 (A) 原始调用者 (User)
关卡分析
The goal of this level is for you to claim ownership of the instance you are given.
Things that might help
- Look into Solidity’s documentation on the
delegatecalllow level function, how it works, how it can be used to delegate operations to on-chain libraries, and what implications it has on execution scope.- Fallback methods
- Method ids
这一关会有两个合约:Delegate 和 Delegation。
1 | // SPDX-License-Identifier: MIT |
Delegate 合约 (被借用的代码库):
Delegation 合约 (你要攻击的目标):
漏洞点:
Delegation合约有一个fallback函数,它会把所有未知的调用都通过delegatecall转发给Delegate合约。Delegate合约里有一个pwn()函数,代码是owner = msg.sender。- 两个合约的存储布局(Storage Layout)是一样的:第一个变量(Slot 0)都是
owner。
攻击逻辑:
如果你向 Delegation 合约发起一笔交易,调用一个叫 pwn() 的函数:
Delegation发现自己没有pwn()函数,于是触发fallback。fallback使用delegatecall把你的请求转发给Delegate。Delegate的pwn()代码被执行:owner = msg.sender。- 由于是
delegatecall,这行代码修改的是 Delegation 合约的 owner。 - 结果:
Delegation的 Owner 变成了你。
exp:
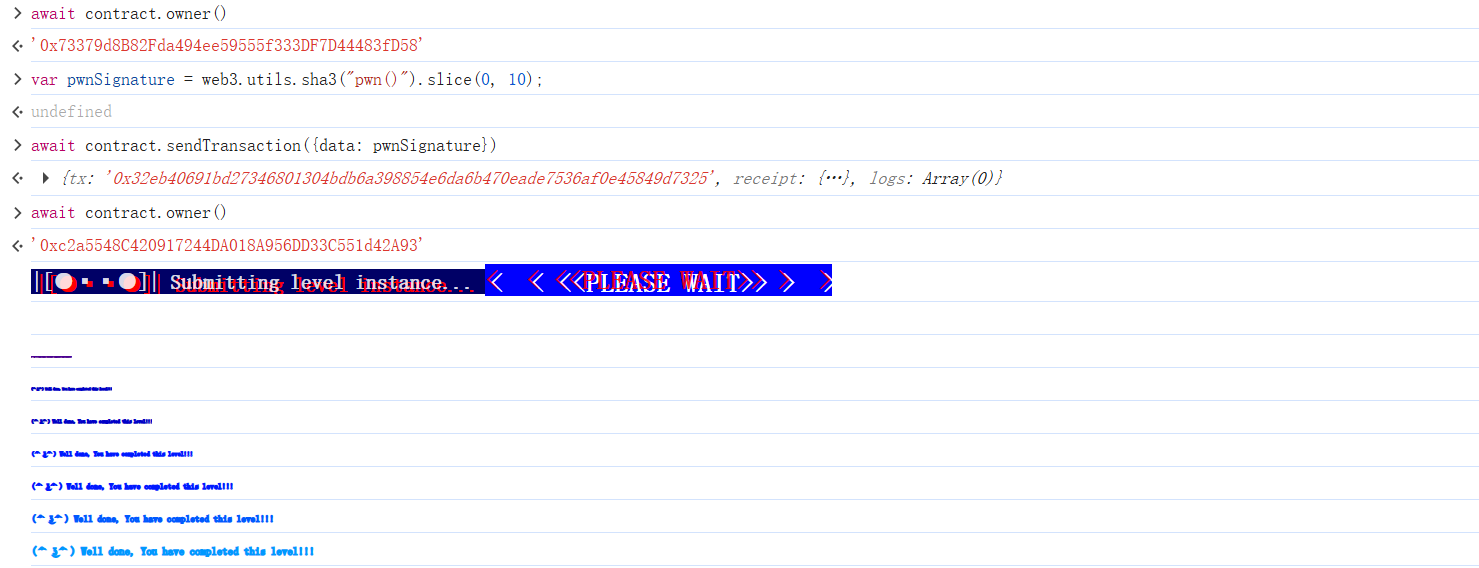
1. 计算函数选择器:pwn() 的哈希值的前 4 个字节。
1 | var pwnSignature = web3.utils.sha3("pwn()").slice(0, 10); |
2. 发起攻击交易:
向合约发送这笔带有特殊数据的交易。
1 | await contract.sendTransaction({data: pwnSignature}) |
3. 验证结果:
等待交易确认后,检查 Owner。
1 | await contract.owner() |
7. Force
selfdestruct (自毁)
这一关的目标非常简单粗暴:强行给一个不收钱的合约转账。
通常情况下,给合约转账需要合约配合:
- 要么有一个
payable的函数(比如deposit())。 - 要么有一个
receive()或fallback()函数来接收直接转账。
如果一个合约是空的(像这一关的合约代码可能就是空的),或者没有这些函数,你直接用 sendTransaction 转账会失败(Revert),因为合约会拒绝接收。
核心漏洞:selfdestruct (自毁)
Solidity 中有一个特殊的命令叫 selfdestruct(address recipient)。
- 作用:销毁当前合约,把它账上所有的 ETH 强制发送给指定的
recipient地址。 - 强制性:这种转账是无法被拒绝的!无论目标合约有没有
payable函数,无论它是否想要这笔钱,它都必须收下。
关卡分析
Some contracts will simply not take your money
¯\_(ツ)_/¯The goal of this level is to make the balance of the contract greater than zero.
Things that might help:
- Fallback methods
- Sometimes the best way to attack a contract is with another contract.
- See the “?” page above, section “Beyond the console”
1 | // SPDX-License-Identifier: MIT |
需要部署一个“自杀式袭击”合约。
1. 编写攻击合约 (Remix)
1 | // SPDX-License-Identifier: MIT |
2. 部署与执行
- 在 Remix 中编译上述代码。
- 部署时存钱:在 Deploy 按钮旁边的 Value 框里,填入一点点 ETH(比如
1 Wei或0.0001 Ether)。这一步很重要,因为我们要送钱过去,首先自己得有钱。 - 点击 Deploy。
- 部署成功后,调用
attack函数,参数填入 Ethernaut 给你的关卡实例地址。 - 点击 transact。
8. Vault
private变量可读
这一关的核心知识点是:区块链上没有秘密。
Unlock the vault to pass the level!
1 | // SPDX-License-Identifier: MIT |
误区解析
很多新手看到 private 关键字:
会下意识地认为:“这个变量是私有的,外部无法访问,所以密码是安全的。”
在 Solidity 中,private 仅仅意味着其他智能合约无法直接读取这个变量。但是,对于区块链网络上的所有节点和观察者来说,所有数据都是公开透明的。
所有的数据都存储在合约的 Storage Slots(存储槽) 里,我们可以直接通过 Web3.js 读取这些存储槽的内容。
存储槽分析 (Storage Layout)
Solidity 的状态变量是按顺序存储在 Slot 里的,每个 Slot 有 32 字节(256位)。
Slot 0
1
bool public locked;
bool类型只占 1 个字节。- 它会被放在 Slot 0 的最右边。
Slot 1
1
bytes32 private password;
bytes32刚好占满 32 个字节。- 因为 Slot 0 剩下的空间不够放 32 字节,所以
password会被放到下一个槽,也就是 Slot 1。
结论:密码就明文存放在 Slot 1 里。
通关步骤
不需要写合约,直接在浏览器控制台操作。
1. 读取密码
我们需要读取合约地址在 Slot 1 处的数据。
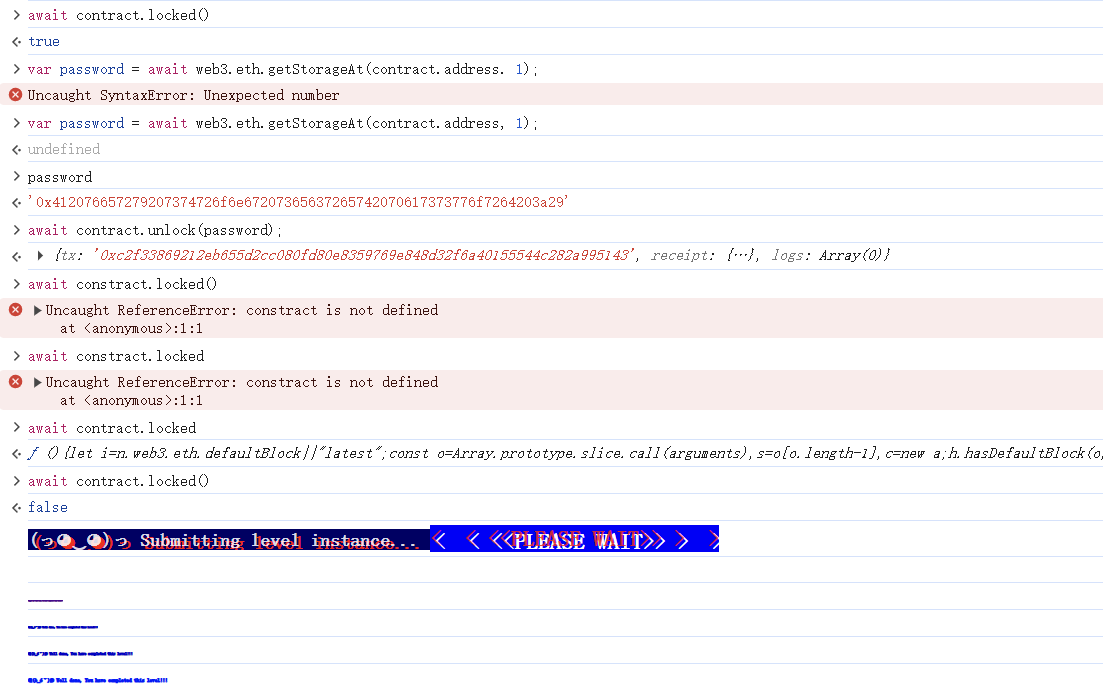
在控制台输入:
1 | // web3.eth.getStorageAt(合约地址, Slot编号) |
输入 password 查看结果,你应该能看到一个 0x 开头的长字符串。这就是密码。
2. 解锁合约
调用 unlock 函数,把刚才读到的密码传进去。
1 | await contract.unlock(password); |
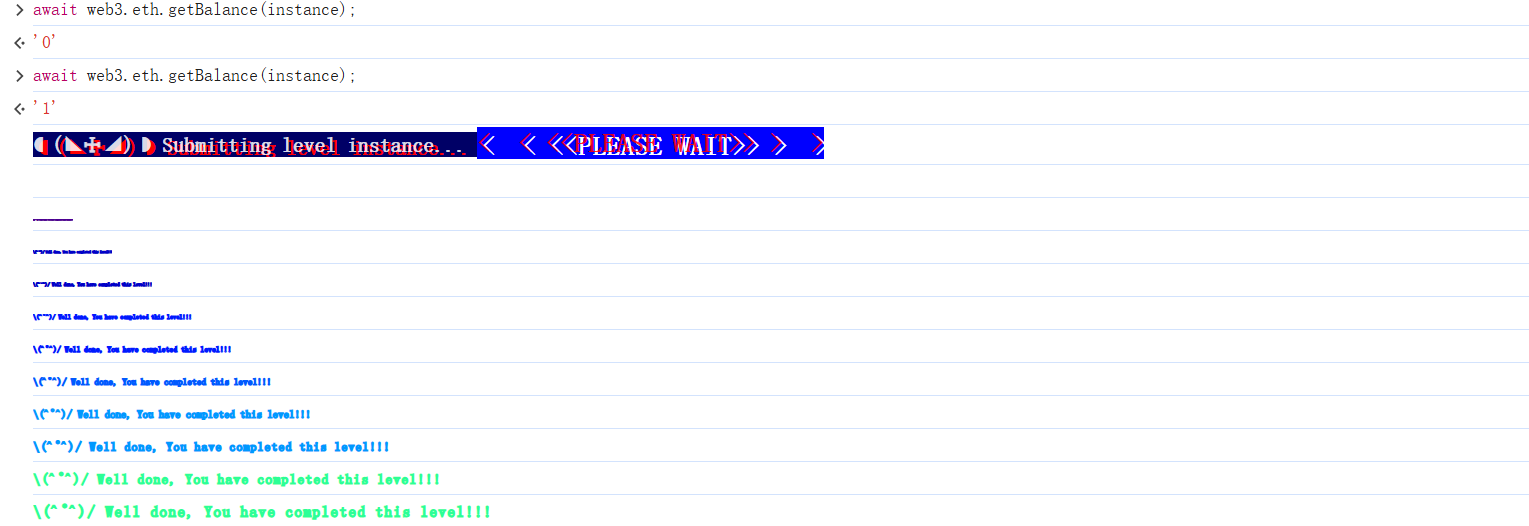
3. 验证与提交
等待交易确认后,检查是否解锁:
1 | await contract.locked() |
如果返回 false,点击 “Submit instance” 通关。
9. King
transfer 函数 & 拒绝转账
这个关卡的目标是打破 King 合约,阻止关卡(level)重新夺回“国王”的宝座。
漏洞在于这一行代码:
1 | payable(king).transfer(msg.value); |
transfer 函数有一个特性:如果接收方是一个智能合约,且该合约没有实现 receive 或 fallback 函数(或者这些函数执行失败),那么转账就会失败并回滚(revert)。如果转账回滚,整个交易都会回滚,这意味着没有人能够取代当前的国王。
解决方案:BadKing 合约
1 | // SPDX-License-Identifier: MIT |
BadKing 合约的设计思路如下:
- 成为国王:在构造函数中发送足够的以太币给
King合约,从而成为新的国王。 - 拒绝接收以太币:故意不实现
receive或fallback函数。
当关卡(或者其他任何人)试图成为新国王时,King 合约会尝试把当前的奖金(prize)发送给 BadKing。由于 BadKing 无法接收以太币,转账会失败,导致交易回滚。因此,BadKing 将永远占据国王的位置。
这是我创建的攻击合约代码:
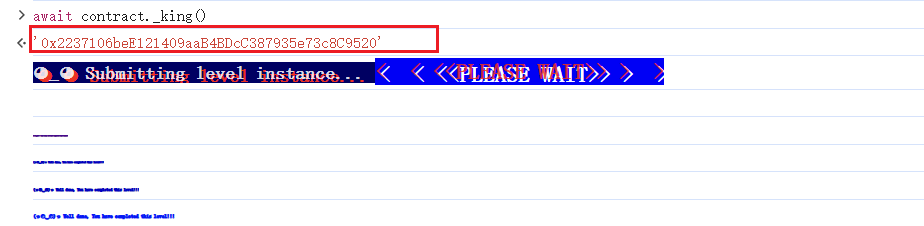
如何使用:
检查
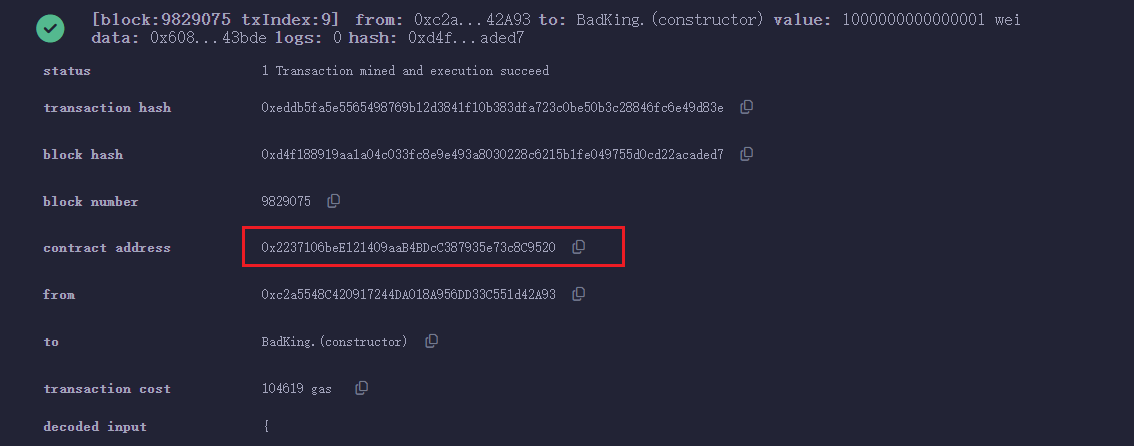
King合约当前的prize(奖金)是多少。部署
BadKing合约,部署时附带的msg.value要稍微高于当前的prize,并将King合约的地址作为参数传入构造函数。提交实例。关卡将无法夺回国王的宝座,你将赢得胜利。
exp
1 | // SPDX-License-Identifier: MIT |
10. Re-entrancy
The goal of this level is for you to steal all the funds from the contract.
Things that might help:
- Untrusted contracts can execute code where you least expect it.
- Fallback methods
- Throw/revert bubbling
- Sometimes the best way to attack a contract is with another contract.
- See the “?” page above, section “Beyond the console”
1 | // SPDX-License-Identifier: MIT |
这个关卡的漏洞位于 Reentrance 合约的 withdraw 函数中。它在更新用户余额(balances[msg.sender] -= _amount)之前,就执行了外部调用(msg.sender.call)发送以太币。
这使得攻击者可以在余额被扣除之前,通过回调函数(receive 或 fallback)再次调用 withdraw 函数,从而反复提取资金。
ReentranceAttack
1 | // SPDX-License-Identifier: MIT |
结合代码逐行拆解这个攻击脚本,看看它是如何一步步掏空目标合约的。
核心逻辑:利用“时间差”
攻击的核心在于利用目标合约的一个逻辑漏洞:它先给钱,后记账。
这就好比你去银行取钱,柜员先把现金递给你,然后再低头去电脑上扣你的余额。如果你手够快,在柜员低头之前,又喊了一句“我要取钱”,柜员看电脑上余额还没扣,就又给你拿了一笔钱。
1. 准备阶段 (constructor)
- 作用:部署攻击合约时,锁定受害者(目标合约)的地址。
2. 发起攻击 (attack 函数)
这是攻击的入口点,由你(黑客)手动调用。
- 存入诱饵 (
donate):- 目标合约有一个检查:
if (balances[msg.sender] >= _amount)。 - 为了能提款,我们必须先在目标合约里有存款。所以我们先“假装”是个好人,存入一笔钱(比如 1 ETH)。
- 目标合约有一个检查:
- 开始提款 (
withdraw):- 我们立即要求把这 1 ETH 取出来。
- 目标合约收到请求,检查余额充足,于是执行
msg.sender.call{value: _amount}("")把钱转回来。 - 关键点:就在这一瞬间,钱发出来了,但目标合约还没来得及执行
balances[msg.sender] -= _amount。
3. 循环收割 (receive 函数)
这是攻击的“自动化”部分。当目标合约把钱转回来时,会自动触发这个函数。
- 触发时机:目标合约正在执行第一次
withdraw,刚把钱发出来,代码执行权暂时交给了攻击合约。 - 再次提款:
- 攻击合约发现目标合约里还有别人的钱(比如还有 100 ETH)。
- 它立即再次调用
target.withdraw(toWithdraw)。
- 为什么能成功?
- 因为第一次调用的
withdraw还没结束,余额扣除代码还没执行。 - 所以在目标合约看来,你的余额依然是 1 ETH!检查再次通过,它又发了一次钱。
- 因为第一次调用的
- 循环:
- 第二次发钱 -> 触发
receive-> 第三次调用withdraw… - 这个过程会一直递归下去,直到
targetBalance变为 0。
- 第二次发钱 -> 触发
Checks-Effects-Interactions
漏洞的根源:
攻击者利用了物理层动作太快,逻辑层记账太慢的时间差。
- 错误顺序(当前漏洞):
- 检查账本(你有钱吗?有。)
- 物理转账(给你钱!) -> 攻击者在这里插入代码,回到第1步
- 修改账本(把你余额扣掉。)
- 正确顺序(安全写法):
- 检查账本(你有钱吗?有。)
- 修改账本(先把你的余额扣掉!)
- 物理转账(给你钱。) -> 攻击者想重入?回到第1步,发现余额已经是0了,拒绝!
这就是著名的 Checks-Effects-Interactions(检查-生效-交互)
11. Elevator
external 的危害
This elevator won’t let you reach the top of your building. Right?
Things that might help:
- Sometimes solidity is not good at keeping promises.
- This
Elevatorexpects to be used from aBuilding.
1 | // SPDX-License-Identifier: MIT |
这个题目一开始看起来还有些难懂,其实目的就是把 top 变量改为 true,但是有一个悖论就是上面的注释,如果isLastFloor 仅仅被实现为一个根据楼层来判断是否是顶楼的逻辑函数,那确实无法改变。注意这一行代码:
1 | Building building = Building(msg.sender); |
目标合约假设调用它的那个地址(也就是你的攻击合约)是一个符合 Building 接口规范的合约。
1 | building.isLastFloor(_floor) |
去调用 msg.sender 地址上的 isLastFloor 函数,因为 msg.sender 是你的合约,所以它自然就调用到了你写在攻击合约里的 isLastFloor 函数。
所以说isLastFloor 实际实现可以我们自己来完成。
1 | // SPDX-License-Identifier: MIT |
如果 Building 是一个诚实的合约(比如真实的物理电梯控制系统),它的逻辑应该是固定的:
- 如果 10 楼是顶楼,那么
isLastFloor(10)永远返回true。 - 如果 10 楼不是顶楼,那么
isLastFloor(10)永远返回false。
悖论出现了:
- 如果要进入
if语句块(去修改top),第一次检查必须返回false(即“这不是顶楼”)。 - 进入
if块后,执行top = building.isLastFloor(floor)。既然刚才说了“不是顶楼”(返回false),那么这里top就会被赋值为false。
这个题目想告诉你:不要信任外部合约调用的返回值,尤其是当该合约由用户控制时。
你需要打破这个悖论,制造一个“撒谎”的 Building:
- 第一次问:“这是顶楼吗?” -> 回答:“不是”(为了骗过
if检查)。 - 第二次问:“这是顶楼吗?” -> 回答:“是”(为了把
top改成true)。
12. Privacy
solidity 内存布局
The creator of this contract was careful enough to protect the sensitive areas of its storage.
Unlock this contract to beat the level.
Things that might help:
- Understanding how storage works
- Understanding how parameter parsing works
- Understanding how casting works
Tips:
- Remember that metamask is just a commodity. Use another tool if it is presenting problems. Advanced gameplay could involve using remix, or your own web3 provider.
1 | // SPDX-License-Identifier: MIT |
这一题有点类似第 8 题,依旧读 private 变量在控制台,主要学习solidity变量内存布局:
存储布局分析
- Slot 0:
bool public lockedbool占用 1 字节。- 状态:Slot 0 已用 1 字节,剩余 31 字节。
- Slot 1:
uint256 public IDuint256占用 32 字节。- Slot 0 剩余空间不够,所以
ID开启新的一行。 - 状态:Slot 1 已满。
- Slot 2:
flattening,denomination,awkwardness(变量打包/Packing)uint8 private flattening(1 字节) -> 放入 Slot 2。uint8 private denomination(1 字节) -> Slot 2 还有空间,紧接着放入。uint16 private awkwardness(2 字节) -> Slot 2 还有空间,紧接着放入。- 状态:Slot 2 共使用了 1+1+2 = 4 字节,还剩 28 字节。
- Slot 3, 4, 5:
bytes32[3] private data- 这是一个固定大小的数组,元素类型是
bytes32。 bytes32需要完整的 32 字节,无法塞进 Slot 2 剩余的 28 字节中,所以开启新槽位。data[0]-> Slot 3 (你之前读取的是这个)data[1]-> Slot 4data[2]-> Slot 5 (解锁需要这个!)
- 这是一个固定大小的数组,元素类型是
控制台输出如下:
1 | >>await contract.locked() |
exp
1 | // SPDX-License-Identifier: MIT |
13. Gatekeeper One
逻辑判断
Make it past the gatekeeper and register as an entrant to pass this level.
Things that might help:
- Remember what you’ve learned from the Telephone and Token levels.
- You can learn more about the special function
gasleft(), in Solidity’s documentation (see Units and Global Variables and External Function Calls ).
1 | // SPDX-License-Identifier: MIT |
1 | function enter(bytes8 _gateKey) public gateOne gateTwo gateThree(_gateKey) returns (bool) { |
- function enter(bytes8 _gateKey):
- 这是标准的函数声明,函数名为
enter,接收一个bytes8类型的参数_gateKey。
- 这是标准的函数声明,函数名为
- public:
- 这是函数的可见性修饰符。表示任何人(外部账户或其他合约)都可以调用这个函数。
- gateOne:
- 这是一个**自定义修饰符 (Modifier)**。
- 在执行
enter函数的主体代码之前,会先执行gateOne修饰符里的代码。 - 如果
gateOne里的require失败,整个交易回滚,enter函数体根本不会执行。
- gateTwo:
- 这是第二个自定义修饰符。
- 执行顺序是:先
gateOne-> 再gateTwo-> 最后enter函数体。
- gateThree(_gateKey):
- 这是第三个自定义修饰符,并且它接收参数。
- 这里将
enter函数接收到的_gateKey参数,透传给了gateThree修饰符。 - 修饰符可以像函数一样接收参数来执行逻辑检查。
- returns (bool):
- 表示函数执行成功后会返回一个布尔值。
执行流程 (The Flow)
当有人调用 enter(key) 时,实际的执行顺序如下:
- 进入 gateOne:
- 检查
msg.sender != tx.origin。 - 遇到
_;(占位符),代码跳出gateOne,继续往下走。
- 检查
- 进入 gateTwo:
- 检查
gasleft() % 8191 == 0。 - 遇到
_;,代码跳出gateTwo,继续往下走。
- 检查
- 进入 gateThree(key):
- 检查那三个复杂的 Key 转换条件。
- 遇到
_;,代码跳出gateThree,继续往下走。
- 最后执行 enter 函数体:
entrant = tx.origin;return true;
exp
1 | // SPDX-License-Identifier: MIT |
最终如下:
14. Gatekeeper Two
逻辑判断
This gatekeeper introduces a few new challenges. Register as an entrant to pass this level.
Things that might help:
- Remember what you’ve learned from getting past the first gatekeeper - the first gate is the same.
- The
assemblykeyword in the second gate allows a contract to access functionality that is not native to vanilla Solidity. See Solidity Assembly for more information. Theextcodesizecall in this gate will get the size of a contract’s code at a given address - you can learn more about how and when this is set in section 7 of the yellow paper .- The
^character in the third gate is a bitwise operation (XOR), and is used here to apply another common bitwise operation (see Solidity cheatsheet ). The Coin Flip level is also a good place to start when approaching this challenge.
1 | // SPDX-License-Identifier: MIT |
- 第一关 (msg.sender != tx.origin):
- 这一关要求调用者 (
msg.sender) 不能是交易的发起者 (tx.origin)。这意味着调用必须来自一个智能合约,而不是直接来自您的钱包账户 (EOA)。 - 解决方案: 我们创建了一个名为
GatekeeperTwoAttack的中间合约来发起调用。
- 这一关要求调用者 (
- 第二关 (extcodesize(caller()) == 0):
- 这一关检查调用者地址的代码大小是否为 0。
- 通常智能合约是有代码的,大小不为 0。但是,在合约的 constructor (构造函数) 执行期间,合约的代码尚未完全存储在区块链上,因此
extcodesize会返回 0。 - 解决方案: 我们将所有的攻击逻辑都放在攻击合约的
constructor中执行。
- 第三关 (异或运算 XOR):
- 条件是:
A ^ Key == 全1 (type(uint64).max)。 - 利用异或运算的可逆性质(如果
A ^ B = C,那么A ^ C = B),我们可以反推 Key:Key = A ^ 全1。 - 这里的
A是uint64(bytes8(keccak256(abi.encodePacked(msg.sender))))。因为我们是从攻击合约调用的,所以msg.sender就是攻击合约的地址address(this)。 - 解决方案: 我们在构造函数中动态计算出这个 Key 并传入。
- 条件是:
GatekeeperTwoAttack
1 | // SPDX-License-Identifier: MIT |
最后截图:
15. Naught Coin
transferFrom & ERC20
NaughtCoin is an ERC20 token and you’re already holding all of them. The catch is that you’ll only be able to transfer them after a 10 year lockout period. Can you figure out how to get them out to another address so that you can transfer them freely? Complete this level by getting your token balance to 0.
Things that might help:
- The ERC20 Spec
- The OpenZeppelin codebase
1 | // SPDX-License-Identifier: MIT |
ERC20 标准中有两种转移代币的方法:
- transfer(to, amount): 我直接转账给你。(这个被锁了)
- transferFrom(from, to, amount): 我授权给第三方(或者我自己),由第三方把我的钱转给你。(这个没有被重写,也没有被锁!)
由于 NaughtCoin 合约继承自 OpenZeppelin 的 ERC20,它自动拥有了父类的 transferFrom 函数。因为开发者忘记重写 transferFrom 并加上 lockTokens 修饰符,所以这个“后门”是敞开的。
通关步骤
你需要利用 approve 和 transferFrom 机制把钱转走。
步骤一:授权 (Approve)
首先,你需要允许你自己(或者另一个地址)支配你的代币。
- 调用
approve(spender, amount)。 spender: 填你自己的钱包地址(是的,你可以授权给你自己)。amount: 填你的全部余额(1000000000000000000000000,即 100万 * 10^18)。
步骤二:通过 transferFrom 转账
授权完成后,调用 transferFrom 把钱转出去。
- 调用
transferFrom(from, to, amount)。 from: 你的钱包地址。to: 任意其他地址(比如关卡实例地址,或者你的另一个小号)。amount: 全部余额。
因为 transferFrom 没有 lockTokens 限制,交易会直接成功,你的余额归零,关卡通过。
控制台 console:实际操作
第一步:授权 (Approve)
允许你自己支配你自己的代币。
1 | // 1. 获取你的全部余额 |
(等待这笔交易确认成功…)
第二步:转账 (TransferFrom)
利用 transferFrom 绕过锁定的 transfer 函数。
1 | // 3. 等待授权交易确认后,调用 transferFrom 把钱转给任意地址 (例如转给合约本身) |
第三步:验证
检查余额是否归零。
1 | // 4. 检查余额是否归零 |
16. Preservation
delegatecall (委托调用)
This contract utilizes a library to store two different times for two different timezones. The constructor creates two instances of the library for each time to be stored.
The goal of this level is for you to claim ownership of the instance you are given.
Things that might help
- Look into Solidity’s documentation on the
delegatecalllow level function, how it works, how it can be used to delegate operations to on-chain. libraries, and what implications it has on execution scope.- Understanding what it means for
delegatecallto be context-preserving.- Understanding how storage variables are stored and accessed.
- Understanding how casting works between different data types.
1 | // SPDX-License-Identifier: MIT |
漏洞分析
- 存储布局不匹配 (Storage Layout Mismatch):
Preservation合约:- Slot 0:
timeZone1Library(地址类型) - Slot 1:
timeZone2Library(地址类型) - Slot 2:
owner(地址类型) - Slot 3:
storedTime(uint256类型)
- Slot 0:
LibraryContract库合约:- Slot 0:
storedTime(uint256类型)
- Slot 0:
- 利用原理:
- 当
Preservation调用timeZone1Library.delegatecall(...)时,库合约的代码会在Preservation的存储上下文中执行。 - 库合约的
setTime函数会写入 Slot 0 (storedTime = _time)。 - 在
Preservation中,Slot 0 对应的是timeZone1Library变量。 - 这意味着调用
setFirstTime实际上允许你修改timeZone1Library的地址。
- 当
攻击计划
- 第一步:调用
setFirstTime,参数填入我们恶意攻击合约的地址。这会将Preservation合约中的timeZone1Library(Slot 0) 覆盖为我们的攻击合约地址。 - 第二步:再次调用
setFirstTime。这一次,Preservation会对我们的攻击合约发起delegatecall。 - 第三步:我们的攻击合约中会有一个同名的
setTime(uint256)函数,该函数会修改 Slot 2(即Preservation中的owner变量),将其改为你的地址。
攻击脚本
1 | // SPDX-License-Identifier: MIT |
为什么要对地址有一个uint160的操作,以下是详细原因:
- 地址的本质是 160 位:
在以太坊中,一个地址(address)占用 20 个字节,也就是 20×8=16020×8=160 位。- 禁止直接转换:
在较新的 Solidity 版本中,编译器不允许直接将address类型强制转换为uint256。如果你尝试写uint256(address(this)),编译器会报错,因为它认为这两种类型的大小不匹配,直接转换可能是不安全的。- 正确的转换路径:
为了将地址变成uint256,必须分两步走:
- **第一步 (address -> uint160)**:先将地址转换为
uint160。这是允许的,因为它们在底层都是 160 位的数据,大小完全一致。- **第二步 (uint160 -> uint256)**:再将
uint160转换为uint256。这是允许的,因为这是从“小整数”转为“大整数”,只是在前面补零而已。
最终截图
17. Recovery
new RLP 地址确定
A contract creator has built a very simple token factory contract. Anyone can create new tokens with ease. After deploying the first token contract, the creator sent
0.001ether to obtain more tokens. They have since lost the contract address.This level will be completed if you can recover (or remove) the
0.001ether from the lost contract address.
1 | // SPDX-License-Identifier: MIT |
解决方案解释
这个关卡的目标是找回发送到一个“丢失”合约地址的 0.001 ether。这个丢失的合约是由 Recovery 合约创建的第一个 SimpleToken 合约。
- 确定性地址计算:
在以太坊中,使用new关键字(CREATE 操作码)创建的合约地址是确定性的。它是根据发送者地址(这里是Recovery合约的地址)和发送者的 nonce 计算出来的。
公式为:Address = keccak256(rlp.encode([sender, nonce])) - Nonce 的确定:
题目中提到这是创建者部署的第一个代币合约。对于合约账户,nonce 从 1 开始计数。因此,创建该代币合约时,Recovery合约的 nonce 为1。 - RLP 编码细节:
为了在 Solidity 中手动计算这个地址,我们需要模拟 RLP 编码过程:- 列表头 (List Header):
0xd6。这是0xc0(列表标识) 加上列表总长度22字节 (20字节地址 + 1字节地址头 + 1字节nonce)。 - 地址头 (Address Header):
0x94。这是0x80(字符串标识) 加上地址长度20字节。 - 发送者地址: 即题目给出的
Recovery实例地址。 - Nonce:
0x01。
- 列表头 (List Header):
- 找回资金:
一旦计算出丢失的合约地址,我们就可以调用该合约上的destroy(address payable _to)函数。这个函数执行selfdestruct(_to),会强制将合约内的所有余额发送给指定的地址。
1 | // SPDX-License-Identifier: MIT |
最后截图:
18. MagicNumber
EVM 字节码
To solve this level, you only need to provide the Ethernaut with a
Solver, a contract that responds towhatIsTheMeaningOfLife()with the right 32 byte number.Easy right? Well… there’s a catch.
The solver’s code needs to be really tiny. Really reaaaaaallly tiny. Like freakin’ really really itty-bitty tiny: 10 bytes at most.
Hint: Perhaps its time to leave the comfort of the Solidity compiler momentarily, and build this one by hand O_o. That’s right: Raw EVM bytecode.
Good luck!
1 | // SPDX-License-Identifier: MIT |
这个关卡的目标是创建一个“Solver”合约,它必须满足两个条件:
- 当被询问
whatIsTheMeaningOfLife()时,返回数字42。 - 合约的大小必须非常非常小,最多 10 个字节。
解决方案解释
普通的 Solidity 合约编译出来通常都很大,因为包含了初始化代码、函数选择器(Function Selector)和其他开销,根本无法满足 10 字节的限制。因此,我们需要直接编写 **EVM 字节码 (Bytecode)**。
我们需要两部分字节码:
- **运行时字节码 (Runtime Bytecode)**:这是合约部署后实际存储在区块链上的代码,也就是我们要执行的逻辑。
- **初始化字节码 (Initialization Bytecode)**:这是用来部署运行时字节码的代码。
1. 运行时字节码 (Runtime Bytecode) - 逻辑部分
我们需要合约返回 42 (十六进制 0x2a)。由于 EVM 的返回值通常是 32 字节(256位),我们需要将 42 写入内存,然后返回这 32 字节。
60 2a(PUSH1 0x2a): 将 42 推入堆栈。60 00(PUSH1 0x00): 将内存偏移量 0 推入堆栈。52(MSTORE): 将 42 存储到内存偏移量 0 处。现在内存里是0x00...002a。60 20(PUSH1 0x20): 将长度 32 (字节) 推入堆栈。60 00(PUSH1 0x00): 将内存偏移量 0 推入堆栈。f3(RETURN): 从内存偏移量 0 开始返回 32 个字节。
结果:602a60005260206000f3 (正好 10 个字节)。
2. 初始化字节码 (Initialization Bytecode) - 部署部分
这段代码的作用是把上面的运行时字节码复制到内存中,然后告诉 EVM:“把这段内存里的数据作为新合约的代码存起来”。
60 0a(PUSH1 0x0a): 运行时代码长度是 10 字节。60 0c(PUSH1 0x0c): 运行时代码在整个字节流中的偏移量。因为初始化代码本身是 12 字节,所以运行时代码紧跟在第 12 字节之后。60 00(PUSH1 0x00): 目标内存偏移量。39(CODECOPY): 将代码复制到内存。60 0a(PUSH1 0x0a): 要返回的代码长度 (10 字节)。60 00(PUSH1 0x00): 代码在内存中的偏移量。f3(RETURN): 返回这段代码给 EVM 进行存储。
结果:600a600c600039600a6000f3 (12 字节)。
3. 组合字节码
将两部分拼起来就是我们要发送的交易数据:600a600c600039600a6000f3 (初始化) + 602a60005260206000f3 (运行时)
代码实现
使用 assembly 的 create 指令来部署这段裸字节码。
1 | // SPDX-License-Identifier: MIT |
下面就来详细解释这段代码:
1 | assembly { |
1. create(v, p, n) 指令
这是 EVM 的操作码,用于创建一个新合约。它接受三个参数:
- v (value): 发送给新合约的以太币数量(单位是 wei)。
- p (position): 内存中包含合约初始化代码的起始位置(偏移量)。
- n (length): 内存中初始化代码的长度(字节数)。
返回值是新部署合约的地址。如果部署失败(例如 revert 或 gas 不足),返回 0。
2. 参数详解
参数 1: 0
- 这是发送给新合约的金额。我们不需要发送任何 ETH,所以是 0。
参数 2: add(bytecode, 0x20)
这是计算字节码在内存中的实际起始位置。
- bytecode 变量: 在 Solidity 中,
bytes memory类型的变量(如这里的bytecode)在汇编中实际上是一个指向内存地址的指针。 - Solidity 内存布局:
- 这个指针指向的第一个 32 字节(0x20)存储的是数组的长度。
- 实际的数据内容是从第二个 32 字节开始的。
add(bytecode, 0x20):bytecode是内存地址(比如 0x80)。0x80处存的是长度(22)。0x80 + 0x20 = 0xa0。- 所以我们需要跳过前 32 个字节的长度前缀,直接指向代码内容的开始处。
参数 3: mload(bytecode)
这是获取字节码的长度。
- mload(p): 从内存地址
p读取 32 个字节的数据。 - bytecode: 正如上面所说,它指向内存中存储该字节数组的地方。
- Solidity 约定: 动态数组(如
bytes)的第一个 32 字节存储的就是它的长度。 - 所以
mload(bytecode)直接读取了存储在bytecode指针位置的数值,也就是这个字节数组的长度(在这里是 22 字节)。
整句话的意思是:
“EVM,请创建一个新合约。不要给它转钱 (
0)。合约的代码在内存中,起始位置是bytecode指针往后挪 32 字节的地方 (add(bytecode, 0x20)),代码的长度就是bytecode变量里存的那个长度值 (mload(bytecode))。”
这里有一个疑问:0x20 字节具体在合约里面指的是什么,bytecode 指针具体是位于那个位置,是加上0x20后的位置,还是什么?
这里用最直观的内存地图来看。
假设在 Solidity 里你写了这一行代码:
当这行代码运行时,内存里会发生什么?
1. bytecode 只是一个路牌(指针)
在汇编(Assembly)层面,变量 bytecode 的值只是一个内存地址。通常情况下,这个地址是 0x80。
所以,当你提到 bytecode 时,你实际上是在说数字 0x80。
2. 内存地图 (Memory Map)
让我们看看从地址 0x80 开始,内存里到底存了什么:
| 内存地址 (Address) | 存储的内容 (Value) | 含义 (Meaning) |
|---|---|---|
| 0x80 (bytecode 指向这里) | 0x0000...0016 |
长度前缀 (32字节)。这里存的是数字 22 (十六进制 0x16),告诉程序这个数组有多长。 |
| 0xA0 (0x80 + 0x20) | 0x600a... |
实际代码。这里才是你写的 hex"600a..." 真正开始的地方。 |
3. 你的疑问解答
问:前32字节具体在合约里面指的是什么?
答: 指的是上表中地址 0x80 到 0x9F 之间的那段空间。这段空间里存的不是代码,而是长度(数字 22)。
问:bytecode具体是位于那个位置?
答:
- 变量 bytecode 的值是
0x80。它指向整个对象的开头(也就是长度前缀的开头)。 - 实际的机器码 (Payload) 位于
0xA0。
问:是加上0x20后的位置,还是什么?
答:
- 如果你想要读取长度,你就用
bytecode(即0x80)。 - 如果你想要读取代码内容,你必须用
add(bytecode, 0x20)(即0x80 + 0x20 = 0xA0)。
4. 为什么要加 0x20?
create 指令就像一个只懂机器码的工人。
- 如果你给它
0x80,它从0x80开始读,读到的是0x00...(长度数据)。它会困惑:“这是啥指令?全是0?” - 如果你给它
0xA0(即add(bytecode, 0x20)),它从0xA0开始读,读到的是0x60...(PUSH指令)。它会说:“懂了,开始干活!”
一句话总结:
指向信封(包含长度信息),add(bytecode, 0x20) 指向信纸(实际内容)。我们要把信纸交给 EVM 去执行,而不是把信封交给它。
19. Alien Codex
integer overflow & 动态数组存储
You’ve uncovered an Alien contract. Claim ownership to complete the level.
Things that might help
- Understanding how array storage works
- Understanding ABI specifications
- Using a very
underhandedapproach
1 | // SPDX-License-Identifier: MIT |
这个关卡的目标是夺取 AlienCodex 合约的所有权。该合约存在一个数组下溢 (Array Underflow) 漏洞,允许我们修改合约的任意存储位置。
漏洞分析
- 数组下溢 (Array Underflow):
- 合约使用的是 Solidity
^0.5.0。在 0.6.0 版本之前,如果对一个长度为 0 的动态数组执行length--,会导致下溢,长度变为−1。 - 这使得数组
codex的长度变得极其巨大,覆盖了整个合约的存储空间。
- 合约使用的是 Solidity
- 存储布局 (Storage Layout):
- Slot 0: 包含
_owner(20 字节) 和contact(1 字节)。它们被打包在一起。 - Slot 1: 存储
codex.length。 - 数组数据:
codex数组的元素从keccak256(1)开始存储。
- Slot 0: 包含
- 任意存储写入:
- 由于数组现在覆盖了整个存储空间,我们可以通过计算特定的索引 i,使得
codex[i]对应到 Slot 0。 - 公式:
keccak256(1) + i = 0(在模下)。 - 所以我们需要计算的索引是:i = 0−keccak256(1)
- 由于数组现在覆盖了整个存储空间,我们可以通过计算特定的索引 i,使得
攻击步骤
- 调用
makeContact():通过contacted修饰符的检查。 - 调用
retract():触发数组下溢,将codex.length变为最大值。 - 计算索引 i:指向 Slot 0 的数组索引。
- 调用
revise(i, new_owner):将 Slot 0 的内容(即 owner)修改为你的地址。
1 | // SPDX-License-Identifier: MIT |
这里为了看懂合约,先了解几个概念:
keccak256(abi.encode(uint256(1))) 为什么要有一个abi.encode呢?
这是因为
keccak256函数的参数要求,在 Solidity 中,keccak256哈希函数只接受 bytes 类型作为输入。1.
keccak256的签名它的定义类似于:
2. 我们的目标
我们想要计算的是:数字 1 的哈希值。
因为动态数组的长度存储在 Slot 1,而数组内容的起始位置是keccak256(Slot 1 的位置),也就是keccak256(1)。3. 为什么不能直接传 1?
如果你写
keccak256(1),编译器会报错,因为1是一个整数 (uint),不是字节数组 (bytes)。4.
abi.encode的作用
abi.encode(...)的作用就是把任何类型的数据(比如数字、地址、字符串)打包编码成 bytes 类型。
abi.encode(uint256(1))会把数字 1 转换成一个 32 字节长的字节数组:0x0000000000000000000000000000000000000000000000000000000000000001这样,
keccak256就能接受这个字节数组并计算哈希值了。
数组的元素为什么从 keccak256(1) 开始存储?
这是 Solidity 语言规范中定义的动态数组存储规则。
静态 vs 动态
- 静态变量(如
uint a,address b)是按顺序一个接一个地放在 Slot 0, Slot 1, Slot 2… 里的。- 动态数组(如
bytes32[] codex)的大小是不确定的,它可能会非常大,甚至无限大。如果把它直接塞在 Slot 序列中间(比如 Slot 1),它一旦变长,就会覆盖掉后面的 Slot 2, Slot 3… 里的其他变量。Solidity 的解决方案
为了解决这个问题,Solidity 采用了一种“分散存储”的策略:
- **占位符 (Slot p):
在定义数组的地方(比如 Slot 1),只存储一个数字:数组的长度 (length)**。
- 对于
codex数组,它的长度就存在 Slot 1。- **实际数据 (Data)**:
数组里的具体元素(codex[0],codex[1]…)被“踢”到了存储空间的一个非常遥远、随机的角落,以免干扰其他变量。
- 这个角落的起始地址就是通过哈希计算出来的:**keccak256(p)**。
- 在这里,
p是存储长度的 Slot 编号(即 1)。- 所以起始地址 =
keccak256(1)。寻址公式
codex[0]存在keccak256(1) + 0codex[1]存在keccak256(1) + 1codex[i]存在keccak256(1) + i总结:
为了不让变长的数组挤占其他变量的位置,Solidity 把数组内容扔到了一个由哈希决定的“远方”,只在原地留了一个“长度”作为路牌。
代码里面为什么要有一个unchecked?
这是因为我们在进行溢出运算。
1. 我们的目标
我们需要计算一个索引
i,使得:keccak256(1) + i = 0(在模 22562256 的意义下)换句话说,我们想要让数组的某个元素“绕地球一圈”,正好落在地址
0(Slot 0) 上。根据简单的代数变换:
i = 0 - keccak256(1)2. Solidity 0.8.0+ 的安全检查
我们的攻击代码是用 Solidity
^0.8.0写的。
从 Solidity 0.8.0 开始,编译器默认开启了算术溢出/下溢检查。
- 如果你尝试计算
0 - 100,程序会直接报错 (Revert),因为它认为这是一个错误(负数在uint中是不存在的)。3.
unchecked的作用但在我们的攻击逻辑中,我们故意想要发生下溢。
- 我们希望
0 - keccak256(1)变成一个巨大的正整数(即 2256−keccak256(1)2256−keccak256(1))。
unchecked { ... }代码块告诉编译器:“在这个大括号里,不要检查溢出或下溢。如果算出来是负数,就让它自动绕回到巨大的正数去,不要报错。”
总结:
没有unchecked,0 - h会导致交易失败。我们需要它来允许这种“数学上不合理但黑客需要”的计算。
最后截图:
20. Denial
Gas 转发机制
This is a simple wallet that drips funds over time. You can withdraw the funds slowly by becoming a withdrawing partner.
If you can deny the owner from withdrawing funds when they call
withdraw()(whilst the contract still has funds, and the transaction is of 1M gas or less) you will win this level.
1 | // SPDX-License-Identifier: MIT |
这个关卡的目标是阻止所有者(owner)从合约中提取资金。漏洞在于 withdraw 函数中对 partner 的外部调用处理不当,导致可以利用 Gas 耗尽攻击来回滚整个交易。
漏洞分析
未检查的外部调用 (Unchecked External Call):
合约执行了partner.call{value: amountToSend}("")。
这种低级call默认会把当前剩余 Gas 的 63/64 转发给被调用的合约 (partner)。Gas 耗尽攻击 (Gas Exhaustion):
如果partner是一个恶意合约,它可以在receive()函数中执行一个死循环(或者其他极其耗费 Gas 的操作),把这转发过来的 63/64 的 Gas 全部烧光。剩余 Gas 不足:
当partner.call因为 Gas 耗尽而返回时,Denial合约只剩下原本 Gas 的 1/64。
接下来的操作包括:payable(owner).transfer(...): 转账操作。timeLastWithdrawn = ...: 修改存储变量 (SSTORE),非常昂贵。withdrawPartnerBalances[...] += ...: 读取并修改存储 (SLOAD + SSTORE),非常昂贵。
题目提到交易 Gas 上限是 100万 (1M)。1M 的 1/64 大约是 15,625 Gas。这通常不足以支付后续的转账和两次存储写入操作。因此,主合约也会因为 Gas 不足 (Out of Gas) 而抛出异常,导致整个交易(包括给 owner 的转账)全部回滚。
1 | // SPDX-License-Identifier: MIT |
这个题目(Denial)主要考察了以下几个核心知识点:
- **外部调用与 Gas 转发机制 (External Calls & Gas Forwarding)**:
- 考察你是否知道 Solidity 的低级
call默认会转发当前剩余 Gas 的 63/64 给被调用者。 - 这是 EIP-150 引入的规则,目的是防止调用栈过深导致的攻击,同时也保留了一小部分 Gas 给调用者处理返回结果。
- 考察你是否知道 Solidity 的低级
- **重入攻击的变种 (DoS via External Call)**:
- 虽然这不是典型的“修改状态导致的重入”,但它利用了外部调用的控制权转移。
- 这是一种 拒绝服务 (Denial of Service, DoS) 攻击。攻击者利用被调用的机会,故意消耗资源,导致主合约逻辑无法继续执行。
- **错误处理与交易回滚 (Error Handling & Revert)**:
- 考察你是否理解:虽然
call本身返回false不会直接导致主合约 revert(除非代码里写了require(success)),但如果主合约后续的操作因为资源不足(Out of Gas)而失败,那么整个交易都会回滚。 - 在这个例子中,
call失败本身被忽略了(代码里没有检查返回值),但正是因为call消耗了太多资源,导致后面的代码跑不动了。
- 考察你是否理解:虽然
- **CEI 模式的重要性 (Checks-Effects-Interactions)**:
- 如果合约严格遵守“检查-生效-交互”模式,即先修改状态(扣款、记账),最后再进行外部调用(转账),那么即使外部调用耗尽了 Gas,之前的状态修改可能已经完成(或者至少不会被外部调用的恶意行为阻塞得这么容易,虽然 Out of Gas 依然会导致整体回滚,但逻辑上更清晰)。
- 不过对于 Gas 耗尽这种 DoS,即使调整顺序也较难完全防御,通常需要限制转发的 Gas 量(例如
call{gas: 50000}(...))。
最后结果如下:
- Title: ethernaut chall Part.I
- Author: henry
- Created at : 2026-01-29 00:46:53
- Updated at : 2026-01-29 01:11:54
- Link: https://henrymartin262.github.io/2026/01/29/ethereum_challenge/
- License: This work is licensed under CC BY-NC-SA 4.0.